- HomeElectronicsAccessories & SuppliesAudio & Video AccessoriesTV Accessories & PartsTV Ceiling & Wall Mounts
Description
**We provide a 1 Year Warranty from the date of purchase & FREE LIFETIME tech support on ALL of our items.**
TO MOUNT BRACKET TO WALL OR 19" RACK:
1. Determine desired wall or rack mounting location.
2. Insert appropriate hardware (screws not included) through keyways in the rear of the bracket and fasten securely to the wall, or insert through round holes and fasten securely to rack.
3. The hinged bracket is removable so that equipment can hinge open on either side.
TO INSTALL EQUIPMENT ON BRACKET:
1. Determine the desired mounting location for the equipment.
2. Align equipment on the bracket.
3. Insert #12-24 screws (not included) into equipment and screw into mounting bracket holes on either side.
4. To access back of equipment, remove L-bracket screws.
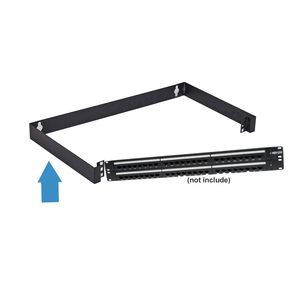
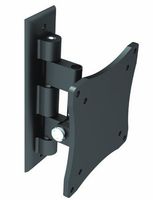
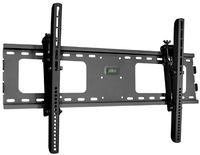
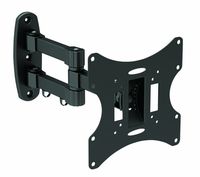
Kenuco 2U 19 Inch Hinged Wall Mount Bracket Network Equipment Rack Electrostatic Powder Coated 16 Gauge Steel Hinged Wall Mount Bracket(2U)
Current Price
$18.99
Average
$18.99
Min Price
$18.99
Max Price
$18.99
Description
**We provide a 1 Year Warranty from the date of purchase & FREE LIFETIME tech support on ALL of our items.**
TO MOUNT BRACKET TO WALL OR 19" RACK:
1. Determine desired wall or rack mounting location.
2. Insert appropriate hardware (screws not included) through keyways in the rear of the bracket and fasten securely to the wall, or insert through round holes and fasten securely to rack.
3. The hinged bracket is removable so that equipment can hinge open on either side.
TO INSTALL EQUIPMENT ON BRACKET:
1. Determine the desired mounting location for the equipment.
2. Align equipment on the bracket.
3. Insert #12-24 screws (not included) into equipment and screw into mounting bracket holes on either side.
4. To access back of equipment, remove L-bracket screws.
TO MOUNT BRACKET TO WALL OR 19" RACK:
1. Determine desired wall or rack mounting location.
2. Insert appropriate hardware (screws not included) through keyways in the rear of the bracket and fasten securely to the wall, or insert through round holes and fasten securely to rack.
3. The hinged bracket is removable so that equipment can hinge open on either side.
TO INSTALL EQUIPMENT ON BRACKET:
1. Determine the desired mounting location for the equipment.
2. Align equipment on the bracket.
3. Insert #12-24 screws (not included) into equipment and screw into mounting bracket holes on either side.
4. To access back of equipment, remove L-bracket screws.
Price will be lower
in next 2 weeks
in next 2 weeks
According to the data, price will be lower in next two weeks, so not waste your money and track better price!
Similar products
