Description
Features:
- DC-DC step down module
- Thickened circuit boards
- Advanced solid-state capacitor
- Short circuit and over-temperature protection
- 100% tested, sealed in anti-static packaging
Kindly Note:
1. Input voltage must be 1.5 V higher than the output voltage, no boost
2. Do not reverse the input and output interface
3. Keep output under 2A (or 15W), and use a heat sink when for a long time working
How to Calibrate the Digital Tube Voltmeter
(Optional steps for the person who need a highly accurate voltage value)
1. Short press the left "ON/OFF" button to start up the digital tube voltmeter. Long press(>1s, <4 seconds) the left button to shut down the digital tube voltmeter.
2. Long press(>4 seconds) the left button to enter self-calibration of voltage measurement(calibration range: -0.5-0.5V, factory setting is 0.0).
"IN" indicator lights = input voltage measurement calibration starts.
Then, long press(>2 seconds) the right "Mode" button, "OUT" indicator lights = output voltage measurement calibration starts.
Tap the left / right button to reduce / rise by one unit (since the voltage value of one unit is less than 0.1V, you need to 1-5 times tap the button continuously, so that the voltmeter can change by 0.1V)
3. After calibration, long press(>2 seconds) the right "Mode" button to preserve the adjusted value(no loss with outage) and back to normal voltage display.
Specifications:
- Model: LM2596/Digital Tube Voltmeter
- Input voltage: DC 4V - 40V
- Output Voltage: DC 1.5V - 35V (adjustable)
- Output Current: 3A (max.)
- Conversion Efficiency: 92% (max.)
- Switching Frequency : 150KHz
- Operating Temperature: -45℃ to +85℃
- Size(L x W x H): 62*35*14mm
- Weight: 21g
Package List:
3x DC-DC Buck Converter Module with LED Display
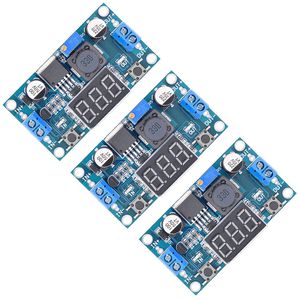
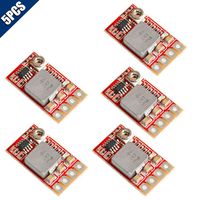
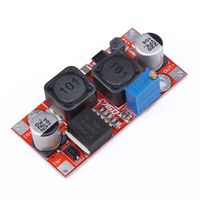
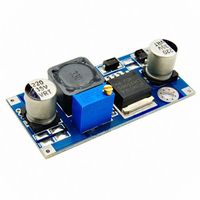
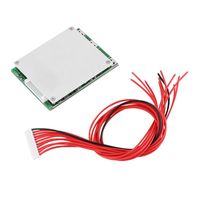
Valefod 3 Pack LM2596 DC to DC Voltage Regulator 4-40V to 1.5-35V Buck Converter with LED Display
Current Price
$12.99
Average
$12.99
Min Price
$11.99
Max Price
$13.99
Price dynamics
0%
Description
Features:
- DC-DC step down module
- Thickened circuit boards
- Advanced solid-state capacitor
- Short circuit and over-temperature protection
- 100% tested, sealed in anti-static packaging
Kindly Note:
1. Input voltage must be 1.5 V higher than the output voltage, no boost
2. Do not reverse the input and output interface
3. Keep output under 2A (or 15W), and use a heat sink when for a long time working
How to Calibrate the Digital Tube Voltmeter
(Optional steps for the person who need a highly accurate voltage value)
1. Short press the left "ON/OFF" button to start up the digital tube voltmeter. Long press(>1s, <4 seconds) the left button to shut down the digital tube voltmeter.
2. Long press(>4 seconds) the left button to enter self-calibration of voltage measurement(calibration range: -0.5-0.5V, factory setting is 0.0).
"IN" indicator lights = input voltage measurement calibration starts.
Then, long press(>2 seconds) the right "Mode" button, "OUT" indicator lights = output voltage measurement calibration starts.
Tap the left / right button to reduce / rise by one unit (since the voltage value of one unit is less than 0.1V, you need to 1-5 times tap the button continuously, so that the voltmeter can change by 0.1V)
3. After calibration, long press(>2 seconds) the right "Mode" button to preserve the adjusted value(no loss with outage) and back to normal voltage display.
Specifications:
- Model: LM2596/Digital Tube Voltmeter
- Input voltage: DC 4V - 40V
- Output Voltage: DC 1.5V - 35V (adjustable)
- Output Current: 3A (max.)
- Conversion Efficiency: 92% (max.)
- Switching Frequency : 150KHz
- Operating Temperature: -45℃ to +85℃
- Size(L x W x H): 62*35*14mm
- Weight: 21g
Package List:
3x DC-DC Buck Converter Module with LED Display
- DC-DC step down module
- Thickened circuit boards
- Advanced solid-state capacitor
- Short circuit and over-temperature protection
- 100% tested, sealed in anti-static packaging
Kindly Note:
1. Input voltage must be 1.5 V higher than the output voltage, no boost
2. Do not reverse the input and output interface
3. Keep output under 2A (or 15W), and use a heat sink when for a long time working
How to Calibrate the Digital Tube Voltmeter
(Optional steps for the person who need a highly accurate voltage value)
1. Short press the left "ON/OFF" button to start up the digital tube voltmeter. Long press(>1s, <4 seconds) the left button to shut down the digital tube voltmeter.
2. Long press(>4 seconds) the left button to enter self-calibration of voltage measurement(calibration range: -0.5-0.5V, factory setting is 0.0).
"IN" indicator lights = input voltage measurement calibration starts.
Then, long press(>2 seconds) the right "Mode" button, "OUT" indicator lights = output voltage measurement calibration starts.
Tap the left / right button to reduce / rise by one unit (since the voltage value of one unit is less than 0.1V, you need to 1-5 times tap the button continuously, so that the voltmeter can change by 0.1V)
3. After calibration, long press(>2 seconds) the right "Mode" button to preserve the adjusted value(no loss with outage) and back to normal voltage display.
Specifications:
- Model: LM2596/Digital Tube Voltmeter
- Input voltage: DC 4V - 40V
- Output Voltage: DC 1.5V - 35V (adjustable)
- Output Current: 3A (max.)
- Conversion Efficiency: 92% (max.)
- Switching Frequency : 150KHz
- Operating Temperature: -45℃ to +85℃
- Size(L x W x H): 62*35*14mm
- Weight: 21g
Package List:
3x DC-DC Buck Converter Module with LED Display
Price will be lower
in next 2 weeks
in next 2 weeks
According to the data, price will be lower in next two weeks, so not waste your money and track better price!
Product review & video
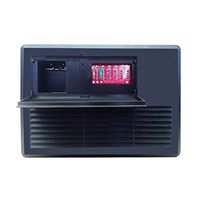
hi welcome to Robo jack in this video we are going to do a test review of this LM two five nine six regulator with the input of four 240 volts and the output of regulated 1.25 to thirty seven volts with the display we are going to test this this can handle up to 3 ampere we are going to see if it can handle 3 ampere Adam under different voltage conditions so let's get started as a step-down converter using the LM two five nine six regulators so this has an LED display that shows the voltage input and output depending on selecting this switch so now it shows the light is on here it shows that the input voltage is 12 point 5 volts if I want to see the output just press this and the light will be on so this shows that the output is now 3 point 7 volts so the first thing I've connected my power supply has 2.3 volts and as you can see here it shows 12.5 so death 12 point 3 is the same as my
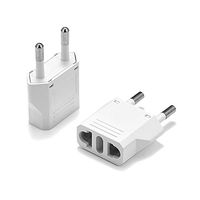
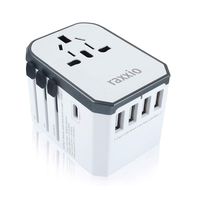

